
Click on the link to jump directly to the help topic. You can click on the "Return to top" link to return to this menu.
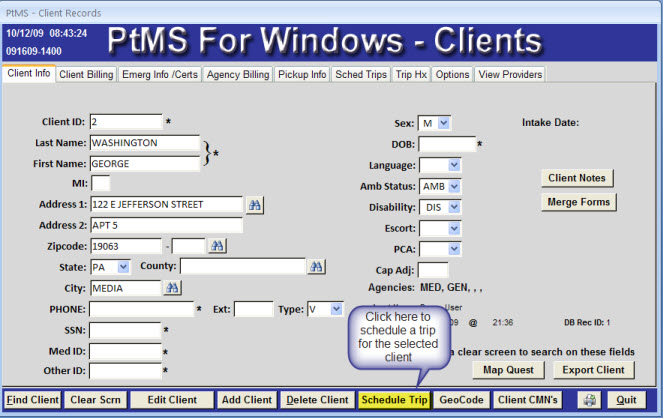
Select a client record then click on the "Schedule Trip" button on the tool bar at the bottom of the client record.
Select the "Trip Type": Demand (enter date), Routine (standing order) or Write In.

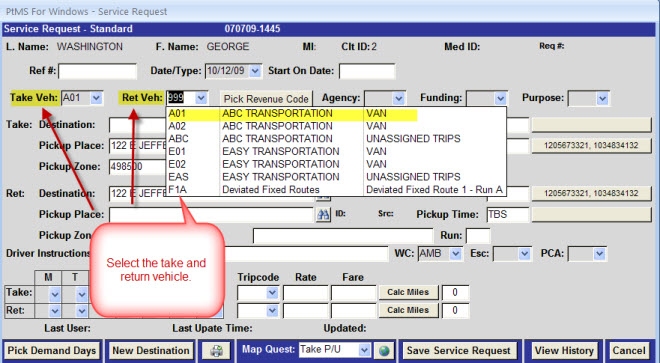
Select the take and return vehicle. If the trip is going to be assigned to a vehicle later, select one of the unassigned trips "vehicles" such as "999".
Click on the "Pick Revenue" code button to display a list of Revenue Codes from the client record. Select a revenue code from the list.

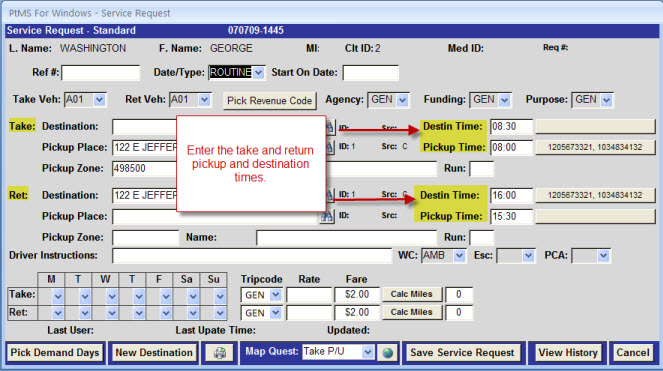
Enter the take and return pickup and destination times.
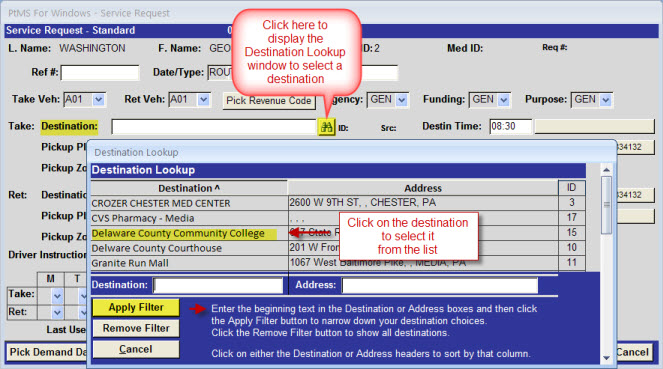
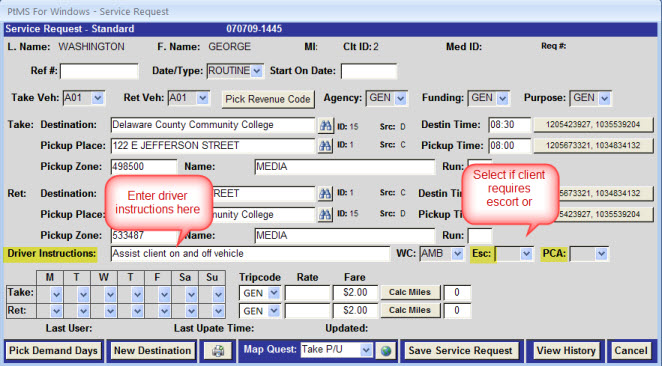
Select a destination using the lookup destination window.
Enter driver instructions and select escort or attendant if needed.
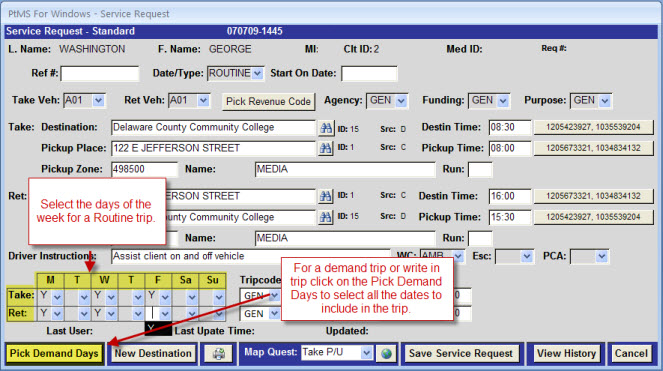
Select days of week for Routine trips, if entering a demand trip click on the Pick Demand Days button to select specific dates to include in the trip.
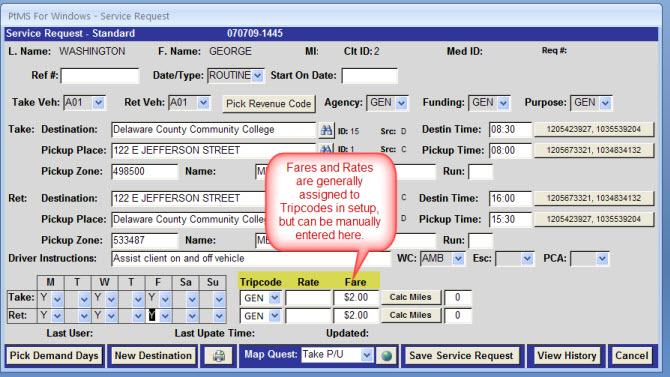
Fares and rates are generally assigned to tripcodes in the tripcode table in setup. Users can manually enter values if needed, however these are generally added by selecting a tripcode from the tripcode table. If the clients Revenue Code included a tripcode then the tripcode, rate, and fare is updated automatically when the Revenue Code is selected.
Click on "Calc Miles" to calculate the one way trip miles from the map.
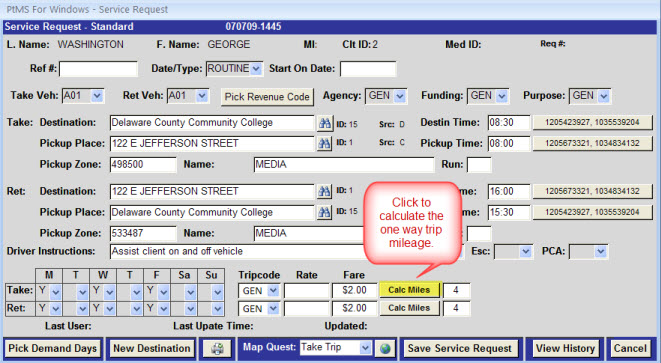
Select "Save Service Request" to save the service request records and enter the one way trip records into the schedule.

 Return to top
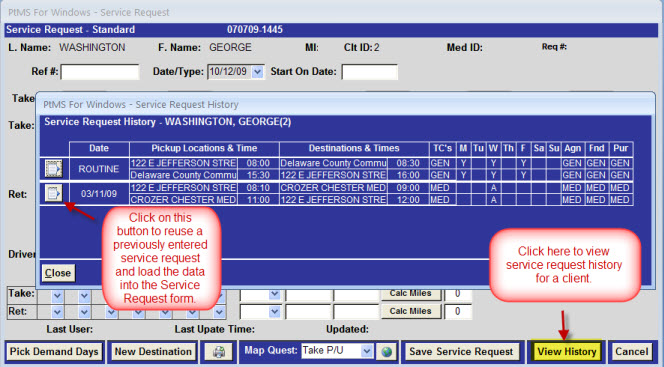
Previously entered servic requests for a client can be reused to enter a new request. This can significantly decrease the time it takes a order taker to enter a new service request. Once on the service request screen click on the "View History" button to view an reuse previously entered requests.
 Return to top
There are 2 different methods for selecting and cancelling schedule records: Cancel by Client and Cancel by Vehicle.
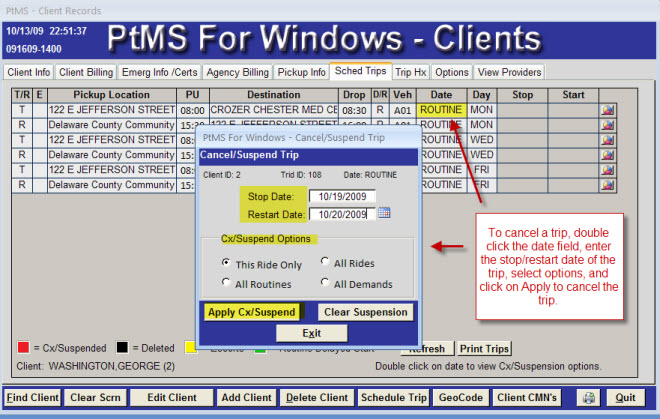
Cancel by ClientSelect a client then click on the "Scheduled Trips" tab. On the trip record you want to cancel, double click in the "Date" field to display the Cancel-Suspend Trip window.
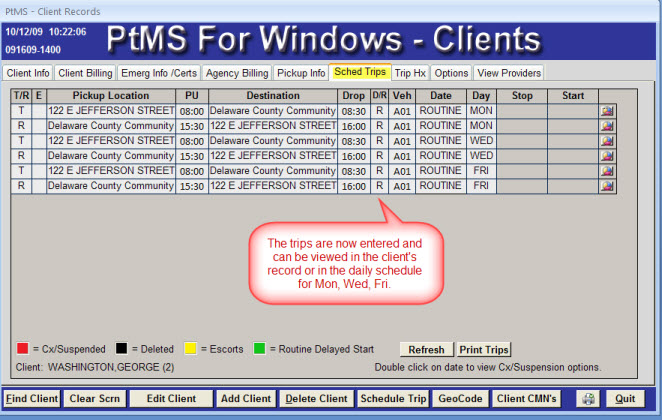
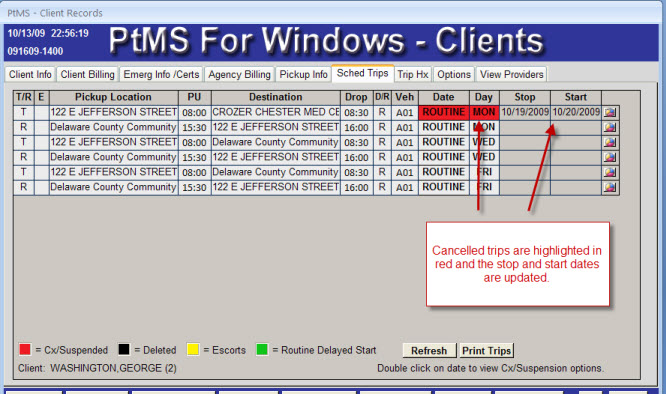
The cancelled trips are displayed in red highlight along with the stop and start dates for the trip.
 Return to Cancel topic
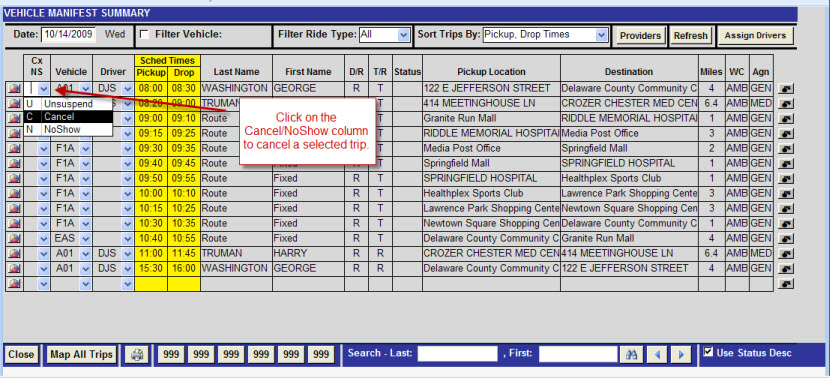
Select the Options tab, the select Vehicle Manifest Edit to view schedules by Vehicle for a schedule date. To cancel a record select "Cancel" from the "Cancel/Noshow" column.
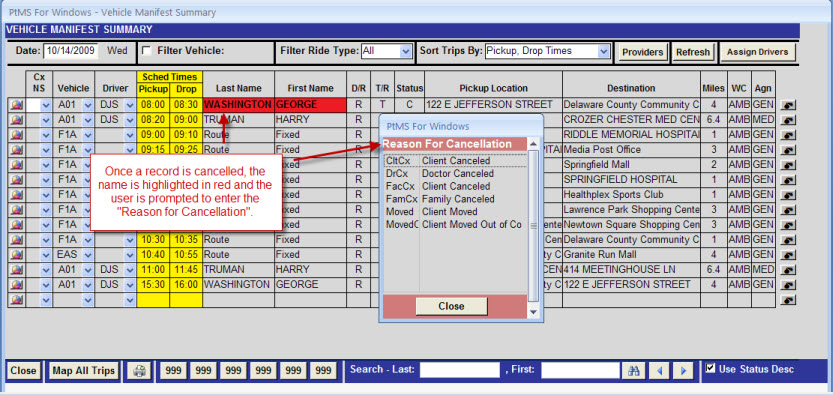
After cancelling the record the user is prompted to enter the "Reason for Cancellation".
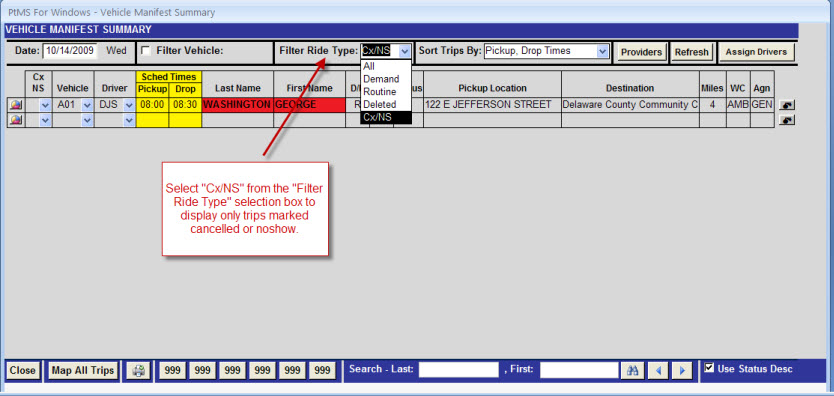
Cancelled trip records are removed from the list of "All Scheduled Trips" once the screen is refreshed. To view all cancelled trips for a schedule date you must select cancelled and noshow trips from the "Filter by Ride Type" selection box.
 Return to Cancel topic
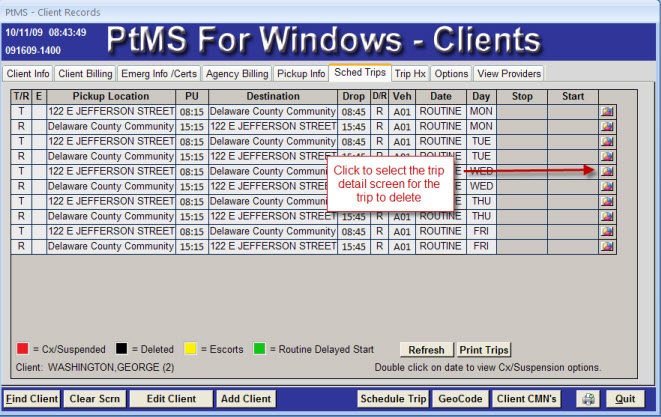
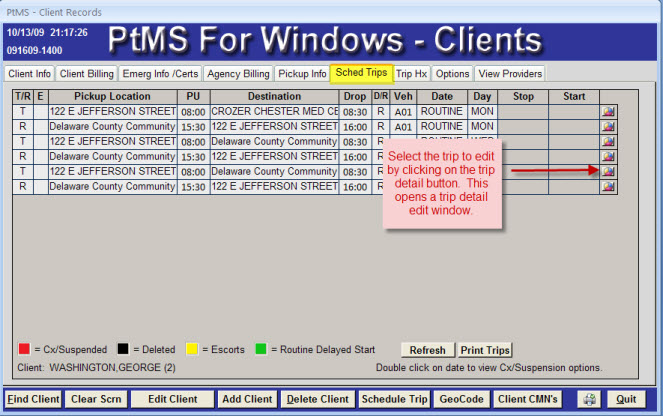
To delete a scheduled trip for a client select the "Scheduled Trips" tab on the client record.
Click on the "Edit Trip Detail button for the trip you want to edit and display the trip detail screen.
On the trip detail screen, click on the down arrow on the status field to display the list of options and select "D" for delete record. Click "Save Changes" to update the record and flag it for deletion.
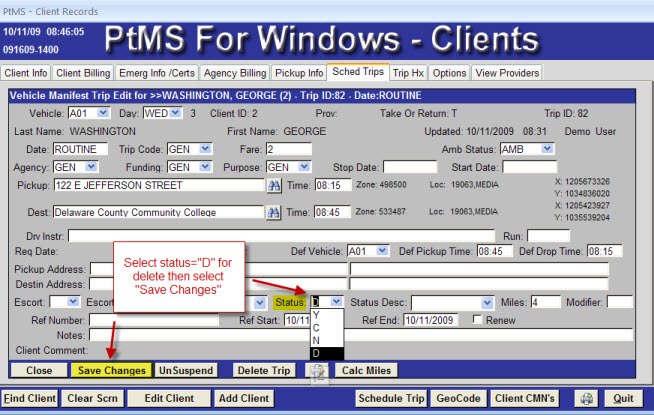
Changing the status of the record to "Deleted" instantly removes the trip record from the schedule. It will not appear on printed lists or browses of active scheduled trips. The daily processing routine for PtMS - System Processing - will remove it from the schedule. If you decide you need to restore the trip, simply edit the status field to blank an "Save Changes" again.
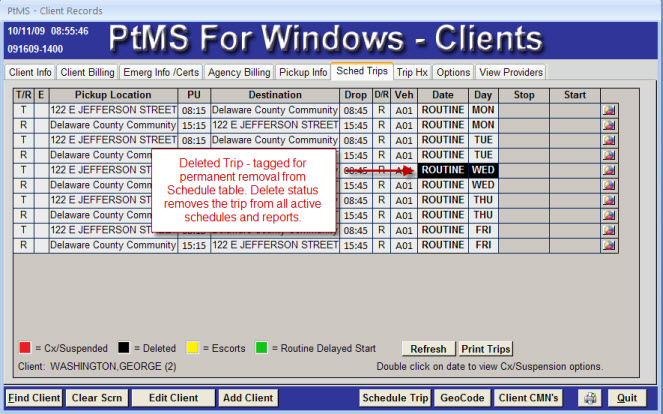
Deleted trip records appear in the client's "Scheduled Trips" display color coded black until System Processing removes them from the Schedule table.
 Return to top
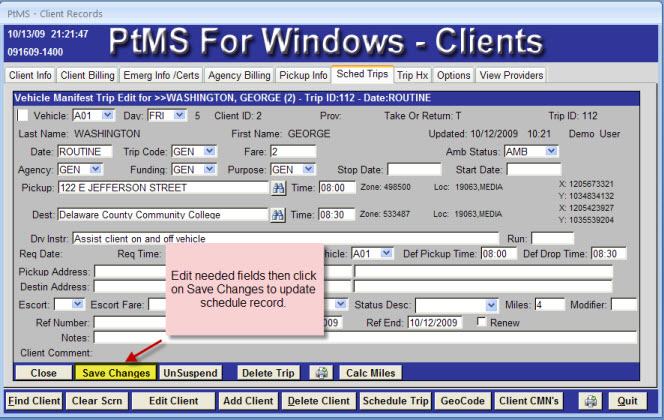
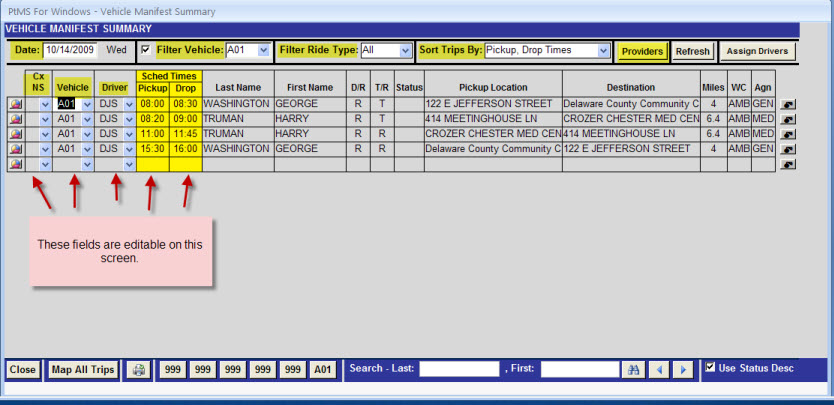
Editing Schedules primarily refers to adjusting scheduled trip pickup times, drop-off times, and vehicle assignment. Other fields such as destination, mileage, etc can be edited using the Schedule Record Detail window.
To edit schedule records for a client, select the "Scheduled Trips" tab on the client record to display all scheduled trips for a client. Click on the detail icon on the far right column to open the scheduled trip detail window.
Edit the fields needed and click on the "Save Changes" button to save edits made to the schedule record.
To edit scheduled trips for a vehicle select the "Options" tab and select "Edit Vehicle Manifest" to display the "Vehicle Manifest Summary" window. This window allows users to display and edit vehicles, pickup and drop-off times for schedule records displayed on the screen. Users can select trips for schedule date, all vehicles or selected vehicles, one - a group - or all providers, or filter trips by trip type (all scheduled trips, demands, routines, or cancelled/noshow trips).
 Return to top
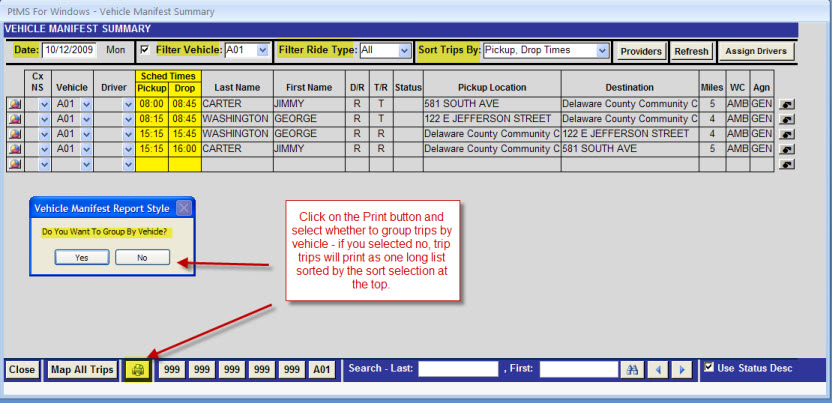
To print a schedule select the Options tab then select "Vehicle Manifest Edit" to display the "Vehicle Manifest Summary" screen for editing and printing schedules for selected trip dates.
Make your schedule record selections and display sort selections these include:
Next, select the "Print" button to print the schedule. A dialogue box will ask if you want your trips printed grouped by vehicle. When priniting trips for all vehicles this option is typically selected.
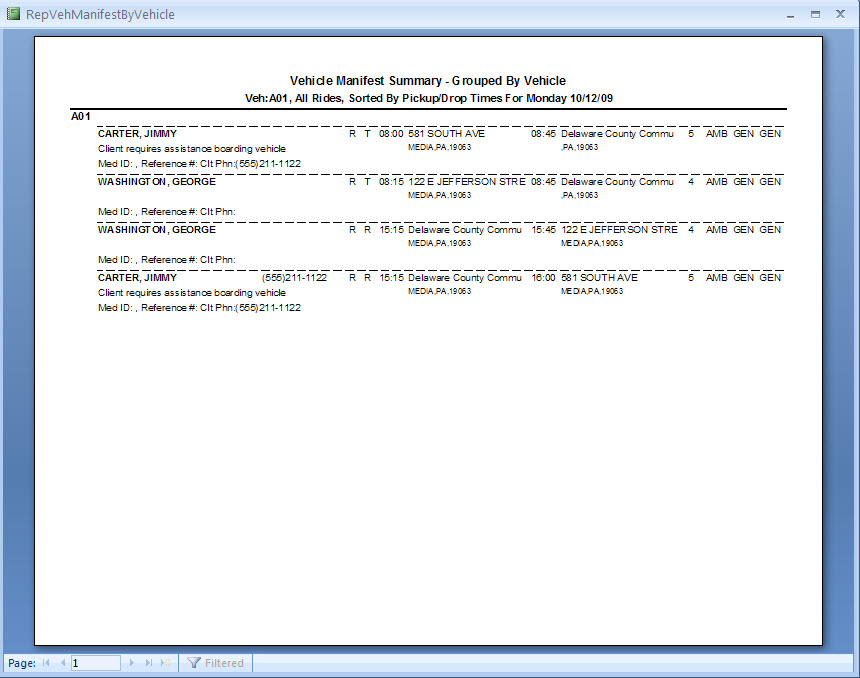
The schedule report will display as a print preview. Click on the print button and make your printer selections, then select OK to print.
 Return to top
Copying Scheduled Trips allows the users to create a new set of trips for a different schedule day/date from an existing set of scheduled trips.
Fox example, an upcoming bad weather day may force the user to cancel all trips for this date except dialysis standing orders. However, due to the bad weather the dailysis trips will need to be consolidated onto a smaller set of vehicles for the next day. The "Copy Scheduled Trips" function could be used to copy all the dialysis standing order trips to a set of demand trips for the bad weather date. The standing order dialysis trips would be cancelled along with all other scheduled trips for this date. The only uncancelled trips will be the dialysis demand trips which can easily be reascheduled onto a few vehicles for the bad weather date.
Select the Options tab then select "Copy/Move Rides" to display the Copy/Move screen.
Enter the schedule date to copy the trips.
Select the function - Copy Rides.
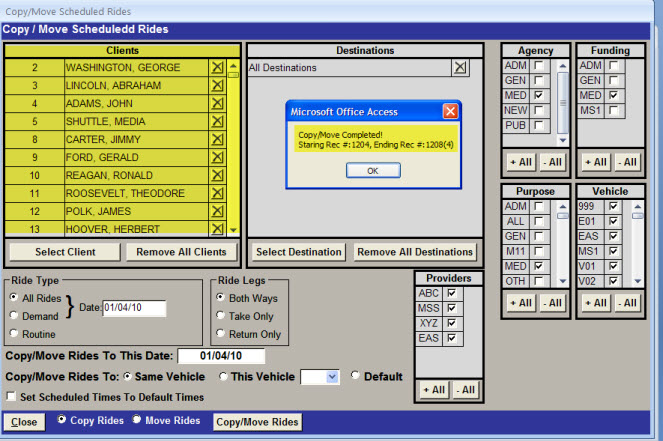
Select trips for copying based on Ride Type (Demand, Routine, or ALL), Clients (or All), Destinations (or ALL), Agency (or All), Funding (or All), Trip Purpose (or All), Vehicle (or ALL) and Provider (or ALL).
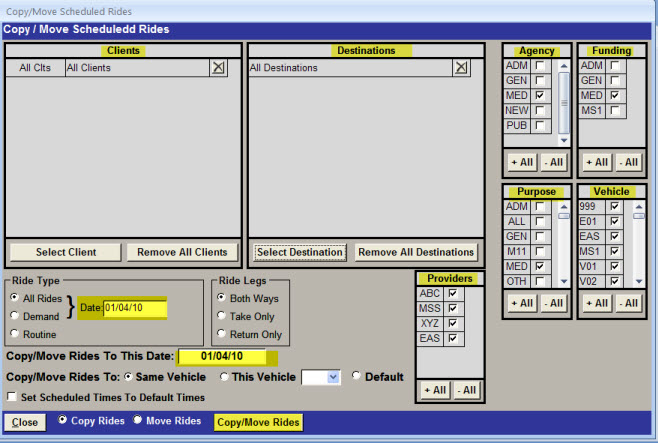
Click the "Copy/Move Rides" button to complete the copy. All the copied trips will be listed in the Clients window on the screen.
 Return to top
The Move vehicle function can be used to assign all trips for a specific date and selectio criteria to a new scheduled vehicle. For example, all trips on Monday for a specific destination can be moved from vehicle A01 to vehicle A02. When moving trips the default vehicle can be reset to the move vehicle.
Select the Options tab then select "Copy/Move Rides" to display the Copy/Move screen.
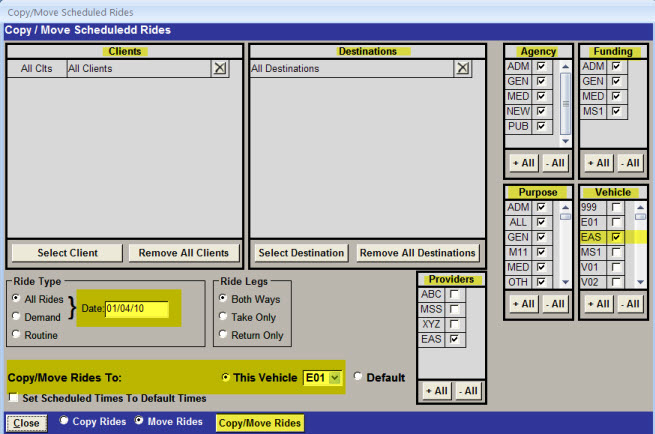
Enter the schedule date to move the trips from one vehicle to another vehicle.
Select the function - Move Rides.
Select trips for copying based on Ride Type (Demand, Routine, or ALL), Clients (or All), Destinations (or ALL), Agency (or All), Funding (or All), Trip Purpose (or All), Vehicle (or ALL) and Provider (or ALL).
Select the vehicle to move the rides to - if you select Default it will assign the selected trips "Default" vehicle as the Scheduled vehicle.
Click on the "Copy/Move Rides" button to complete the move.
 Return to top
Trip Suspensions allows the users to suspend multiple trips for a single or multiple clients. Trip Suspensions can be for any length of time.
Select the Options tab then select "Trip Suspensions" to display the Trip Suspensions screen.
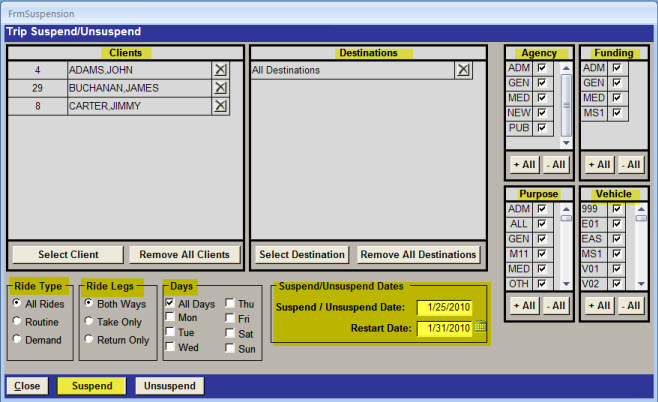
Select trips for suspension based on Ride Type (Demand, Routine, or ALL), Ride Leg (Take, Return, or Both), Days of the Week (or All), Clients (or All), Destinations (or ALL), Agency (or All), Funding (or All), Trip Purpose (or All), and Vehicle (or ALL).
Enter the Suspension Date and Restart Date - the Suspension date is when the trip suspension begins and the Restart Date is when the suspension ends and the trips resumes operation.
Click on "Suspend" button to complete the suspension.
Note: Suspended trips can also be Unsuspended using the Trip Suspension screen.
Return to top